The last time I made classic shalité, it did not turn out well: it tasted way too bready, was way too hard and, unfortunately, burnt. Having gained more confidence with baking over the past year, I decided to give it a few more tries to see if I can get it to taste like my aunt’s!
If you are unsure what this “shalité” is: it’s a shallow fried Evazi flatbread made in the shape of disks, and it is usually garnished with Mahveh (fermented anchovy paste). Each bite is heavenly, as you get that fried flavour without feeling that you are having something very heavy. The mahveh adds a unique savory flavor that elevates the dish to a whole different level, though shalité can be enjoyed as is, or if you wish to be traditional, with herbs such as dill, the green bits of scallions, parsley, coriander and mint. Or… if you have a sweet tooth like me, break tradition and have it with Nutella, or cream cheese and honey!
Ingredient Notes
I’ve noted down the original ingredients suggested by my aunt below, but please note that these cannot be used to exactly reproduce her recipe, as she relies on doing things by eye!
- 1000 g wheat flour (number 2 or number 3)
- 1 tbsp sugar
- just under 1 tbsp salt (assuming that you’re planning to add Mahveh afterwards, which is salty)
- 1 tbsp yeast
- Between 1.5-2 cups of water (or until the mixture doesn’t stick to your fingers)
In my case, I modified the ingredients quite a bit to be able to get close to her recipe.
Flour
The main thing I played around with is the flour: number 2 flour refers to a type of flour found in the UAE that I believe is described as all purpose flour. However, shalité has a slight bready taste, which to me is an indication that the use of all purpose flour outside the UAE is not a perfect substitute. This is why the last time I tried re-creating this recipe, I substituted 50% of the flour with wholemeal. Unfortunately that was too bready, so this time I went for a 16% replacement instead.
Yeast
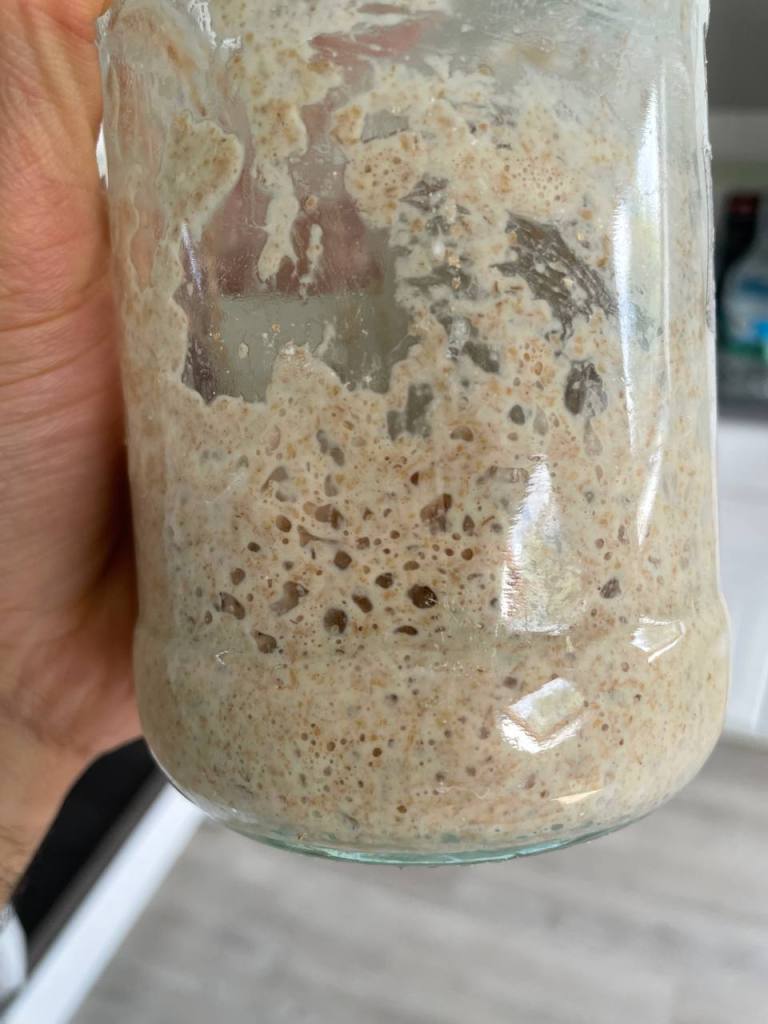
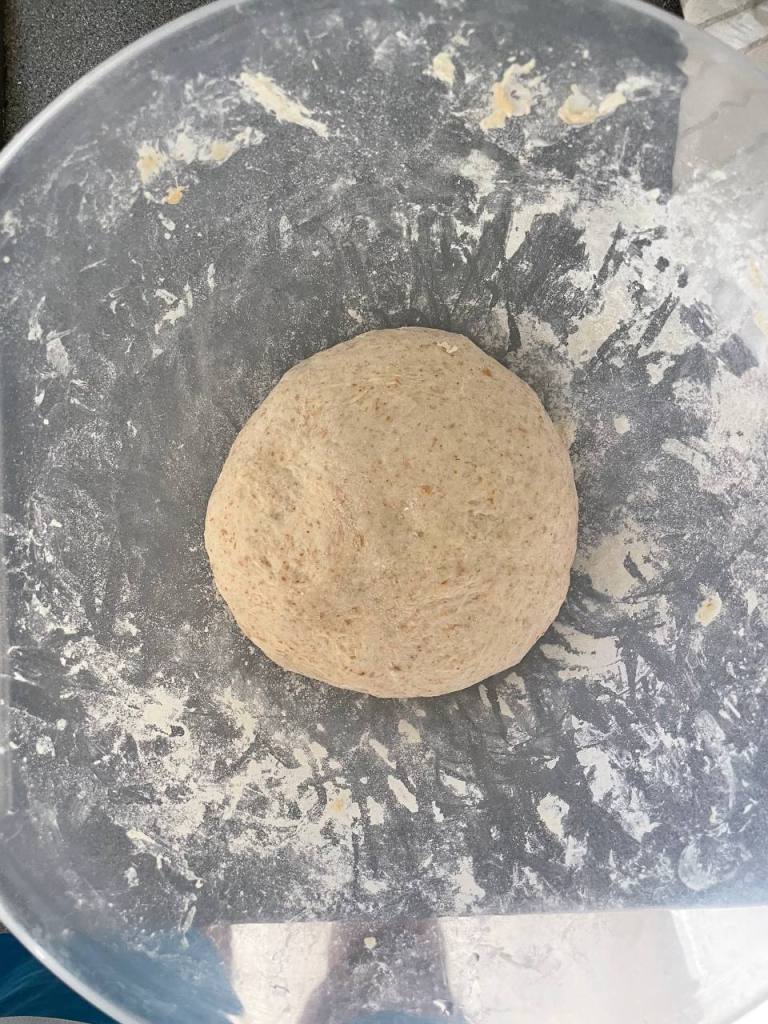
If you’ve been reading my blog, then you’ll know about my exceptional sourdough bagels. Given my recent success I wanted to see if I can use sourdough instead of commercial yeast for this recipe. I was not too worried about imparting a sour flavor, as the bacteria in my sourdough starter don’t seem to produce a noticeable amount of lactic acid unless I severely overferment the starter. This was going to be a fun experiment, and while it sounds funky, it is in fact closer to how shalité was made back in the day when no commercial yeast was available! Both my aunt and grandma concur that during their childhood, they would mix water and flour and leave for a few days before using it to make bread.
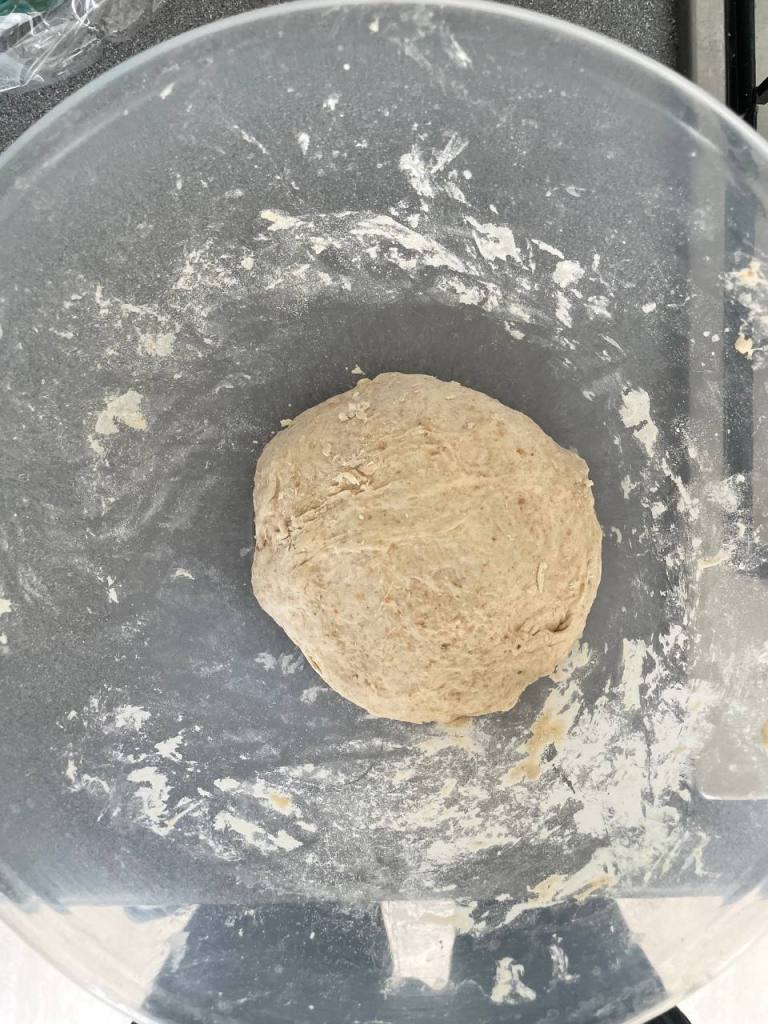
My Ingredients for This Attempt
I was making a smaller batch than my aunt’s recommend (crazy) 1 kilo!
- 300 g all purpose flour (McDougalls)
- 100 g (100% hydration) sourdough starter pre-fed with 50 g wholemeal starter from Lidl
- 175 g water
- 25 g extra flour (to make sure the dough isn’t wet)
- roughly 1/3 tbsp sugar
- roughly 1/3 tbsp salt
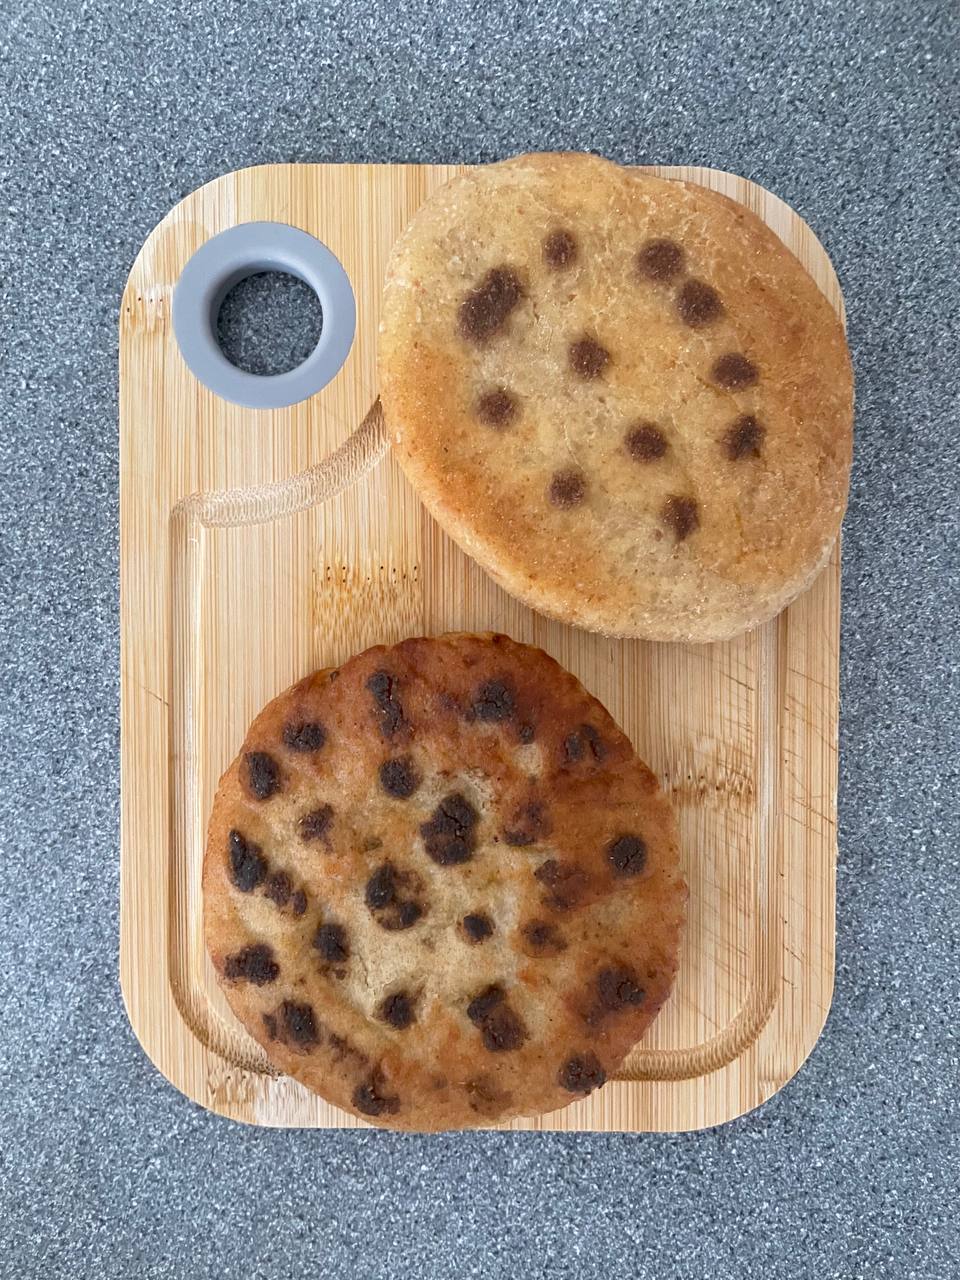
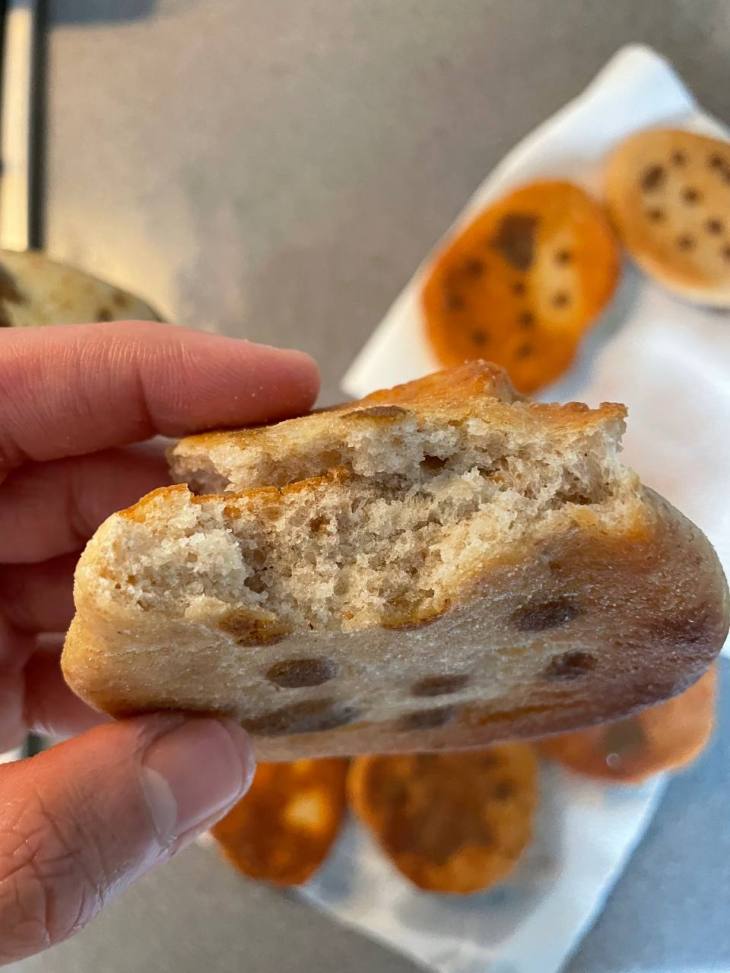
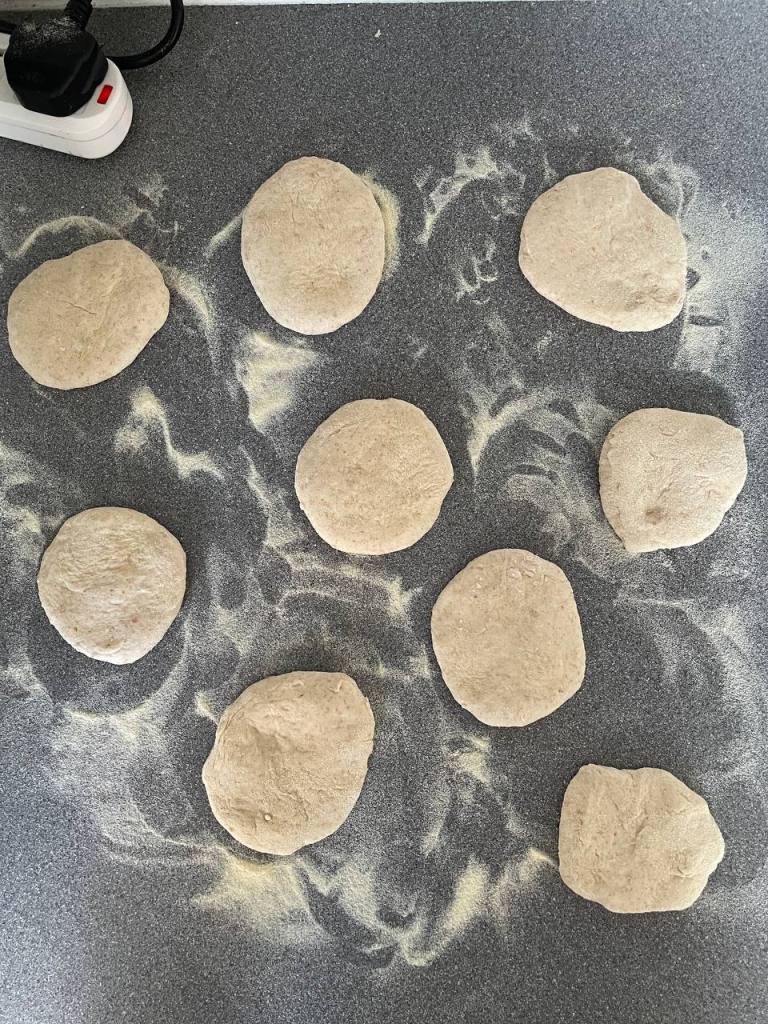
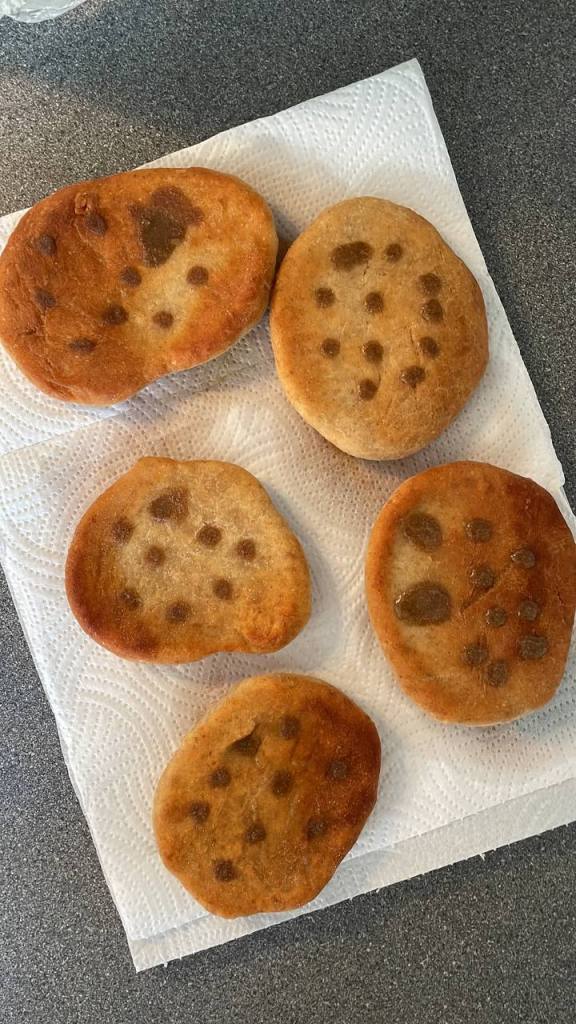
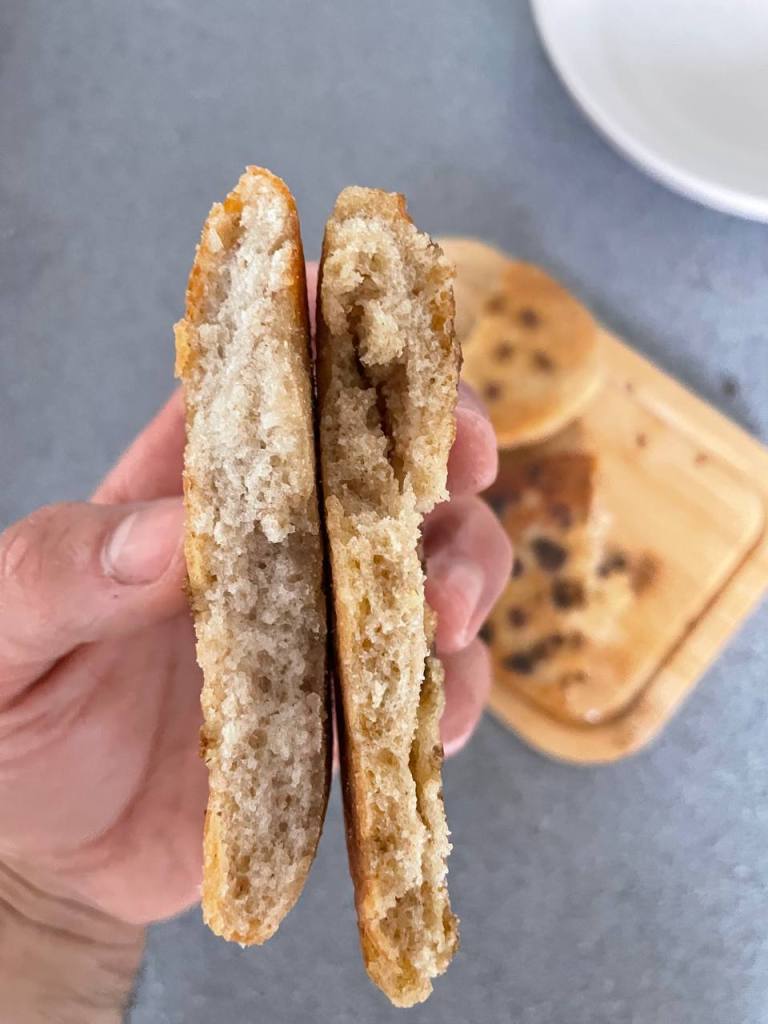
Final Outcome
I was pleasantly surprised with the outcome, though it still requires lots of work to be like my aunt’s shalité! The differences I noticed are noted down below:
- The flavor is not the same. Unlike my first attempt, I felt like this batch of shalité needed more of a bready flavor I think this can be fixed by increasing the amount of wholemeal flour. Perhaps a 33 or 40 percent substitution will do the trick!
- The shalité surface is still very hard. This was despite cooking with an adequate amount of oil over low heat. My aunt’s shalité have a uniform texture throughout. I’m not entirely sure where I’m going wrong, but I have a few theories:
- I knead the dough too much. I still haven’t figured out the correct ratios of water to flour, so this leads to an overly sticky dough that I have to keep adding flour to
- I don’t have a uniform heat source, or a uniform surface. I believe this leads to bits hardening quickly
- I don’t cover my dough in the final rise. I believe this leads to the formation of a crust which could explain the hard crust.
- Not letting the dough rest enough. I was in a bit of a rush this time, so I relied on a 30 degree oven to encourage the yeast to proof the dough. I also rushed the final proof.
Excited to try this again with some of the modifications above. For now, enjoy photos of the final outcome and of the process.


Leave a comment